
Setting up a Raspberry Pi VPN connection is easy. Once subscribed to a VPN service you can access the internet using it and protect your privacy.
A VPN (Virtual Private Network) creates an encrypted tunnel between your computer and a remote server. All your internet traffic is routed through the tunnel and appears to the other end to be using the IP address of the VPN server. This hides your normal IP address which in turn hides your identity and location.
You can find free VPN services out there but a legitimate service only costs £35 a year and is considerably more reliable and trustworthy.
I have been using Private Internet Access for a number of years. You can use it on multiple devices and I use it on my Smartphone whenever I connect to “free” WiFi when out shopping (remember when we could do that!).
Step 1 – Sign-up to PrivateInternetAccess
To use their service you will need to subscribe to obtain a username and password. You can do that here : https://www.privateinternetaccess.com/pages/buy-vpn/raspberrypi
Step 2 – Update your Pi OS Installation
As with most tutorials it is always best to ensure you have the latest packages loaded. Run these commands to update your package lists and install updates.
sudo apt update
sudo apt upgrade
Step 3 – Install OpenVPN
PIA can use the widely used open source project client program OpenVPN. Install it using this command:
sudo apt install openvpn
Step 4 – Download VPN Configuration Files
Once installed browse to the openvpn directory:
cd /etc/openvpn/
Now the Private Internet Access configuration files can be downloaded from their website:
sudo wget https://www.privateinternetaccess.com/openvpn/openvpn.zip
The contents of the zip file can be extracted using:
sudo unzip openvpn.zip
This will place a number of “ovpn” configuration in the openpvn directory.
Step 5 – List Available PIA VPN Servers
You can list the available VPN servers using:
ls *.ovpn -l
The filename indicates where the VPN server is located.
Step 6 – Find Pi VPN External IP Address
At this point you should check what IP address your internet connection is using:
curl https://api.ipify.org
This gives you the IP address that the outside world sees when you connect to external services.
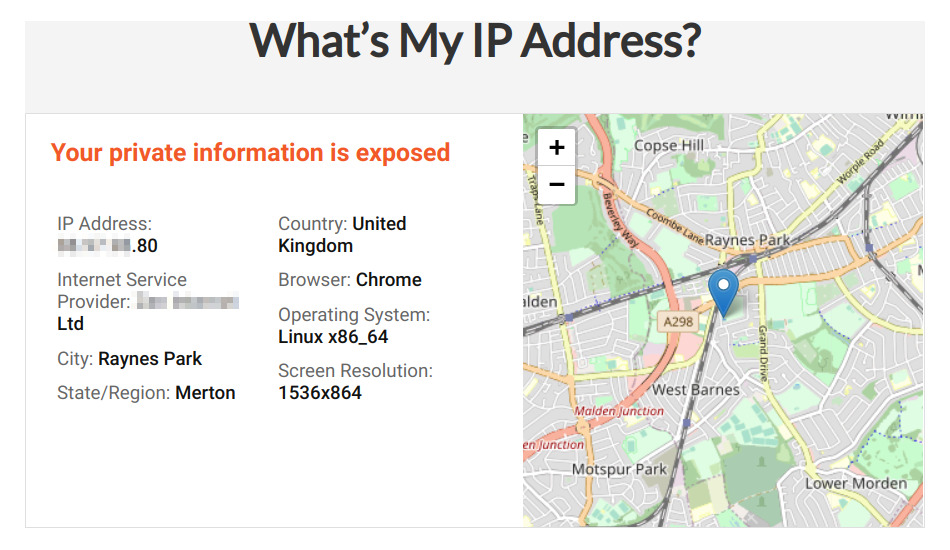
If you are running a desktop environment you can also visit the Private Internet Access “Whats my IP” page. It will show you what your external IP is and where in the World it thinks you are located based on that address.
Step 7 – Run OpenVPN
You could run OpenVPN at this point with a specific server using:
sudo openvpn Sweden.ovpn
It will prompt you for your Private Internet Access account details. You will be connected to a VPN server and the VPN tunnel with be created. The process will not return you to the command prompt.
If you use a second terminal window or SSH session you can re-run
curl https://api.ipify.org
and you should see a different IP address.
The running OpenVPN process can be stopped using CTRL-C. This will return you to the command prompt and your external IP address will return to the IP address assigned by your ISP.
In the following steps you’ll see how to simplify the username/password process.
Step 8 – Store PIA Username and Password
Entering your username and password every time might not be practical. So they can be stored in a text file:
sudo nano auth.txt
Enter your Private Internet Access user account details:
yourusername

yourpassword
To save and exit the nano text editor use CTRL-X then Y then ENTER.
All the ovpn configuration files can be updated to use this text file. The following command will update all the ovpn files in the current directory:
sudo find *.ovpn -type f -exec sed -i 's/auth-user-pass/auth-user-pass auth.txt/g' {} \;
It replaces all instances of “auth-user-pass” with “auth-user-pass auth.txt”.
Step 9 – Autostart OpenVPN on Pi Boot
If you want the Pi VPN connection to be made when the Pi starts that is fairly easy to do.
First you need to make a copy of the ovpn file that you want OpenVPN to use when the Pi boots.
sudo cp Sweden.ovpn autostart.conf
Then edit the OpenVPN configuration file:
sudo nano /etc/default/openvpn
Find the line:
#AUTOSTART="all"
and change it to:
AUTOSTART="autostart"
Use CTRL-X, Y and ENTER to save and exit the nano text editor.
Finally reboot the Pi using:
sudo reboot
If you want to disable the autostart you can re-edit the openvpn config file and place a # character in front of the AUTOSTART line.
Step 9 – Check Your Pi VPN Connection
To check the VPN connection is working you can use a number of techniques:
From the command line:
- Run
curl https://api.ipify.org
to check your external IP address - Run
curl http://api.geoiplookup.net/?query=IP
to check your location (replace IP with IP address returned by ipify.org)
If you are running the desktop on your Pi try:
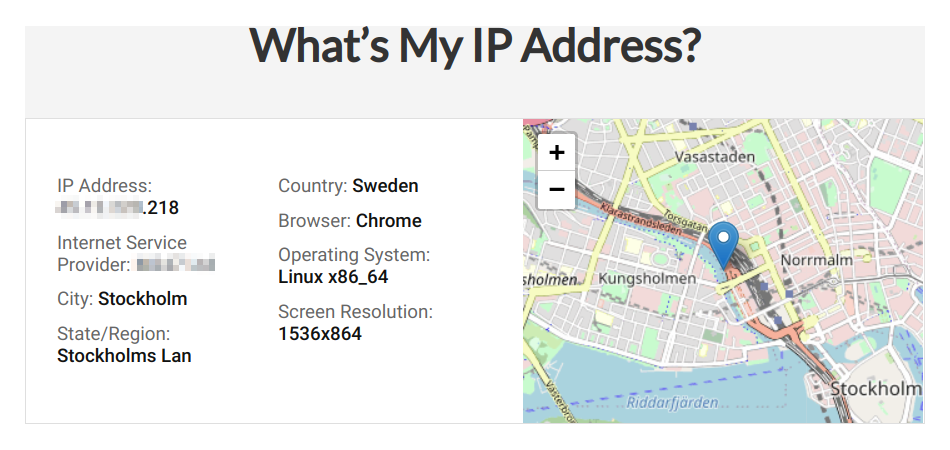
- Visit the Private Internet Access “Whats my IP” page
- Google “what is my ip” to check your external IP address
Using the Private Internet Access “Whats my IP”page now shows that my Pi appears to be located in Sweden:
Affiliate Links
The links in this guide to Private Internet Access are affiliate links. That means I get a small commission if someone signs up to their service using those links. There are plenty of other VPN providers and the setup process is very similar. I’m happy to endorse PIA as my preferred VPN provider as I have paid for and used their service for a number of years on my PC, phone, laptop and Pi devices.
The post Raspberry Pi VPN Setup Guide appeared first on Raspberry Pi Spy.
from Raspberry Pi Spy https://ift.tt/2UXEFdR


No comments:
Post a Comment
Please do not enter any spam link in the comment box.