Wow, DIY-Maxwell, wow. This reddit user got their hands on one of our new Raspberry Pi High Quality Cameras and decided to upgrade their homemade microscope with it. The brains of the thing are also provided by a Raspberry Pi.
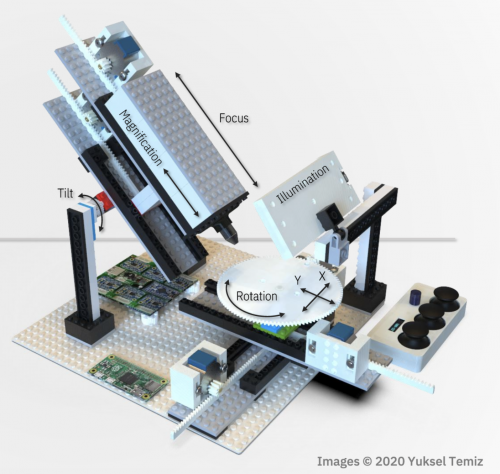
Key features
- Raspberry Pi OS
- 8 MegaPixel CMOS camera (Full HD 30 fps video)
- Imaging features from several centimetres to several micrometers without changing the lens
- 6 stepper motors (X, Y, tilt, rotation, magnification, focus)
- Variable speed control using a joystick controller or keyboard
- Uniform illumination for imaging reflective surface
- Modular design: stages and modules can be arranged in any configuration depending on the application
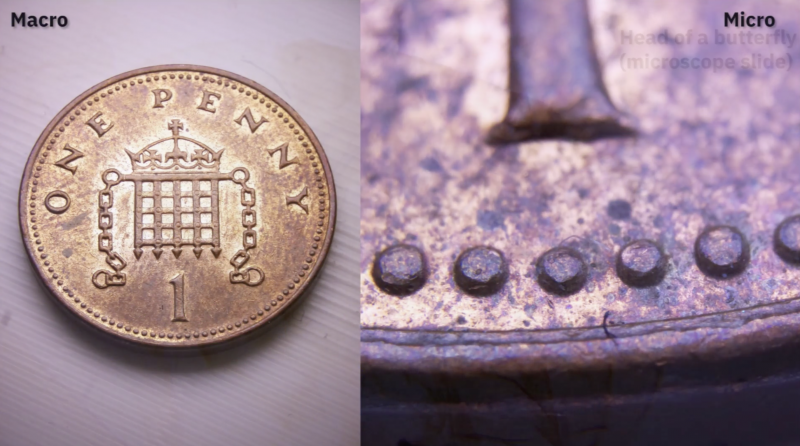
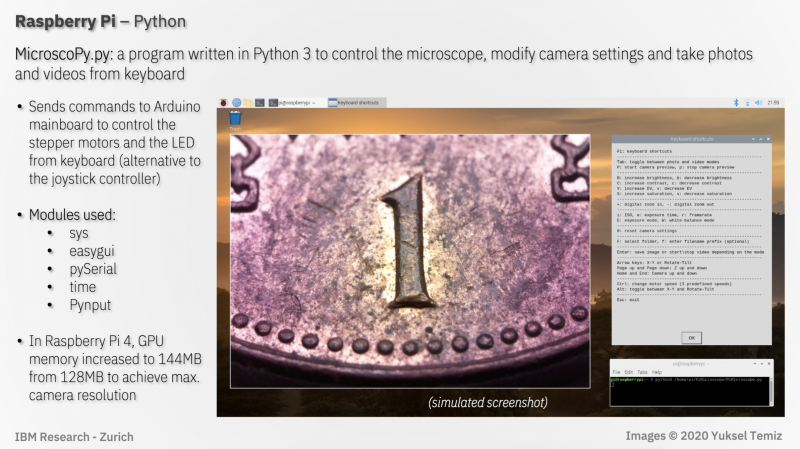
Here’s what a penny looks like under this powerful microscope:
Check out this video from the original reddit post to see the microscope in action.
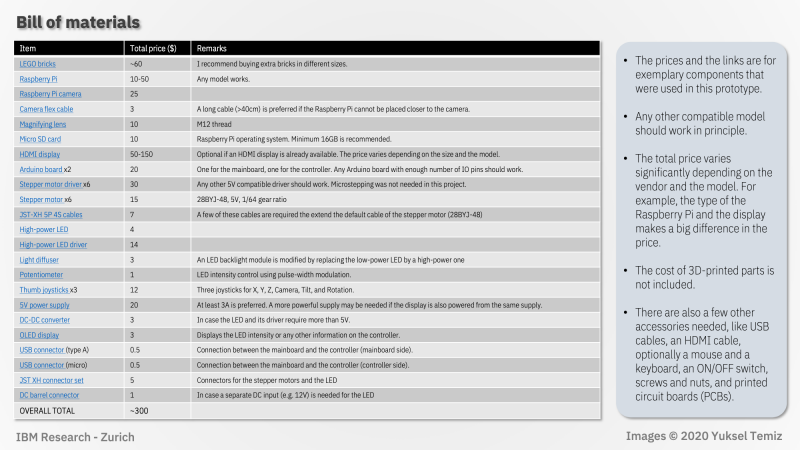
Bill of materials
The user has put together very detailed, image-led build instructions walking you through how to create the linear actuators, camera setup, rotary stage, illumination, title mechanism, and electronics.
The project uses a program written in Python 3 (MicroscoPy.py) to control the microscope, modify camera settings, and take photos and videos controlled by keyboard input.
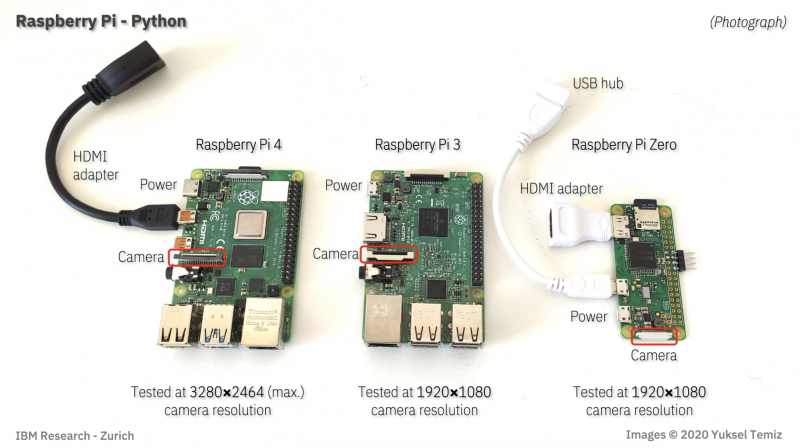
Here is a quick visual to show you the exact ports you need for this project on whatever Raspberry Pi you have:
In the comments of the original reddit post, DIY_Maxwell explains that $10 objective lens used in the project limited the Raspberry Pi High Quality Camera’s performance. They predict you can expect even better images with a heavier investment in the lens.
The project is the result of a team at IBM Research–Europe, in Zurich, who develop microfluidic technologies for medical applications, needing to provide high-quality photos and videos of their microfluidic chips.
In a blog for IEEE Spectrum, IBM team member Yuksel Temiz explains: “Taking a photo of a microfluidic chip is not easy. The chips are typically too big to fit into the field of view of a standard microscope, but they have fine features that cannot be resolved using a regular camera. Uniform illumination is also critical because the chips are often made of highly reflective or transparent materials. Looking at publications from other research groups, it’s obvious that this is a common challenge. With this motivation, I devoted some of my free time to designing a multipurpose and compact lab instrument that can take macro photos from almost any angle.”
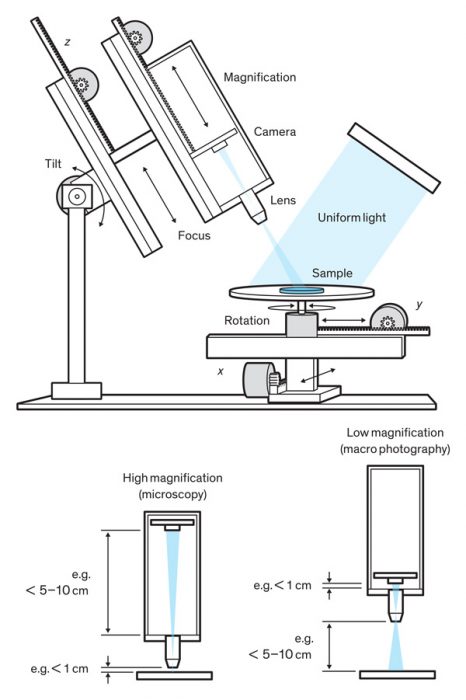
Here’s the full story about how the Raspberry Pi-powered creation came to be.
And for some extra-credit homework, you can check out this document comparing the performance of the microscope using our Raspberry Pi Camera Module v2 and the High Quality Camera. The key takeaway for those wishing to upgrade their old projects with the newer camera is to remember that it’s heavier and 50% bigger, so you’ll need to tweak your housing to fit it in.
The post Raspberry Pi High Quality Camera powers up homemade microscope appeared first on Raspberry Pi.
from Raspberry Pi Blog – Raspberry Pi https://ift.tt/3emKM37
https://ift.tt/3dsVdRv


No comments:
Post a Comment
Please do not enter any spam link in the comment box.